JavaScript — Integrating Jasmine with RequireJs (AMD)
AngularJs Meetup South London Collection | this article
How to use RequireJs with Jasmine 2.x
This article will go through the changes you have to do to migrate your code and the default test runner SpecRunner.html to use RequireJs. We will cover:
- Changes to the default Jasmine setup
- RequireJs configuration
- Changes to our libraries and specs.
Source code available at gsans/jasmine-require-bootstrap (Github).
Jasmine Default Setup
Find the steps to setup Jasmine here. We are going to use this folder structure.
├───src
├───tests
│   └───lib
└───vendor
Your SpecRunner.html should look similar to this:
<!DOCTYPE HTML>
<html>
<head>
  <meta http-equiv="Content-Type" content="text/html; charset=UTF-8">
  <title>Jasmine Spec Runner v2.0.0</title>

  <link rel="shortcut icon" type="image/png" href="lib/jasmine_favicon.png">
  <link rel="stylesheet" type="text/css" href="lib/jasmine.css">

  <script type="text/javascript" src="lib/jasmine.js"></script>
  <script type="text/javascript" src="lib/jasmine-html.js"></script>
  <script type="text/javascript" src="lib/boot.js"></script>

  <!-- include source files here... -->
  <script type="text/javascript" src="../src/my-library.js"></script>

  <!-- include spec files here... -->
  <script type="text/javascript" src="../src/my-library.specs.js"></script>

</head>

<body>
</body>
</html>
This is how my-library.js and my-library.specs.js look like
// my-library.js
var myLibrary = (function() {
  function sayHello() {
    return "Hello";
  }
  return {
    sayHello: sayHello
  };
})();

// my-library.specs.js
describe("my-library", function(){
  describe("sayHello", function(){
    it("should say Hello", function(){
      expect(myLibrary.sayHello()).toEqual("Hello");
    })
  })
})
If you have node installed in your machine you can use http-server to run the SpecRunner.html passing the only spec in our suite.

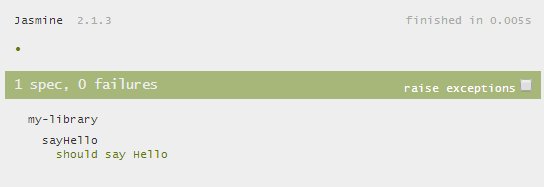
SpecRunner.html output
RequireJs Setup
In order to use RequireJs we will have to change our previous SpecRunner.html page to the following:
<!DOCTYPE HTML>
<html>
<head>
  <meta http-equiv="Content-Type" content="text/html; charset=UTF-8">
  <title>Jasmine Spec Runner v2.0.0</title>

  <link rel="shortcut icon" type="image/png" href="lib/jasmine_favicon.png">
  <link rel="stylesheet" type="text/css" href="lib/jasmine.css">
  <script type="text/javascript" src="../vendor/require.js" data-main="main"></script>
</head>
<body>
</body>
</html>
We removed all external scripts files and only left require.js.
Note how we omitted the .js extension for main.js. This is how RequireJs identifies files by default.
RequireJs configuration file — main.js
In main.js we will set the configuration options to load all dependencies and bootstrap Jasmine.
// Requirejs Configuration Options
require.config({
  // to set the default folder
  baseUrl: '../src',
  // paths: maps ids with paths (no extension)
  paths: {
      'jasmine': ['../tests/lib/jasmine'],
      'jasmine-html': ['../tests/lib/jasmine-html'],
      'jasmine-boot': ['../tests/lib/boot']
  },
  // shim: makes external libraries compatible with requirejs (AMD)
  shim: {
    'jasmine-html': {
      deps : ['jasmine']
    },
    'jasmine-boot': {
      deps : ['jasmine', 'jasmine-html']
    }
  }
});
We used jasmine-boot as an alias for boot.js
RequireJs Bootstrap
This setup will start with jasmine-boot identifier. It has two dependencies: jasmine and jasmine-html. As jasmine-html has jasmine as a dependency it will then proceed to load jasmine.js, then jasmine-html.js and finally boot.js as it was doing on our original runner.
We use _require() _to load dependencies before running our code.
require(['jasmine-boot'], function () {
  require(['my-library.specs'], function(){
    //trigger Jasmine
    window.onload();
  })
});
The previous code will load all jasmine-boot dependencies and continue with our specs in my-library.specs.js.
Note that if we had moved my-library.specs to the same level as_ jasmine-boot_ it could had been loaded before all jasmine-boot dependencies were done.
Once all script files are loaded we trigger window.onload() as Jasmine hooks into this event to initialise its engine.
Changes to our library
In order to create our library we will wrap it using define. As we don’t have any dependencies it will be empty. Note also how we added a return statement at the end, this is so it can be used on other modules via parameters without polluting the global window object.
define([], function(){

  var myLibrary = (function() {
    function sayHello() {
      return "Hello";
    }
    return {
      sayHello: sayHello
    };
  })();

  return myLibrary;
})
We use define() to define our libraries. This can load dependencies and return an instance for others to use.
Changes to our specs
In order to migrate our specs we will repeat the same as we did before. In this case we do have a dependency as we need to load my-library.js in order to run our tests.
define(['my-library'], function(myLibrary){

  describe("my-library", function(){
    describe("sayHello", function(){
      it("should say Hello", function(){
        expect(myLibrary.sayHello()).toEqual("Hello");
      })
    })
  })

})
The myLibrary parameter will get the instance returned by our library new definition.
We can now run our tests taking advantage of RequireJs helper functions making the testing experience more enjoyable.
Resources
Angular — Unit Testing with Jasmine

